Recently, a company called UUNATEK reached out to me to ask for a review of their iDraw Pen Plotter. This happens from time to time and I am always excited when I can give students an opportunity to beta test or review a product and see that their opinions matter and can hold sway in the "real world". These sorts of partnerships can also make a big difference for schools running STEAM on a limited budget and you may be surprised how much free stuff you can get for your classroom just by sending an email and asking.The iDraw is not the first plotter that I have had here in the STEAMlab. I bought a Makeblock XY Plotter years ago to do some laser engraving and while that one doesn't get a lot of use, this one got my students really excited. Over the course of a few recesses and lunches, three grade six volunteers put it together and ran it through its paces. With practically no help from me, they managed to get it up and running and did some pretty cool stuff with it.
Once I've had some time with it myself, I will post my own thoughts on the iDraw. For now, I want to share the thoughts of the three grade six girls who have been giving up their time to come in to the lab and build this robot for me.
Reviewing the iDraw Pen Plotter
by Stella, Yu-Hsuan and Alisa
Assembly
 |
| When we received iDraw, it was carefully wrapped in plastic, and it was easy to open. |
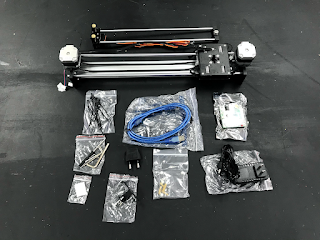 |
| This is what we got when we finished unwrapping it. |
 |
| We connected the two parts for the X and Y axis. |
 |
| After that, we had to screw in two tiny black screws. It was a little bit challenging, since the two poles kept moving and were somewhat oily. |
 |
| Next, we attached two belts on the y-axis. This part was very difficult for us. The belts are very tight, which makes the screws hard to screw in, so you might need the help from another person. |
 |
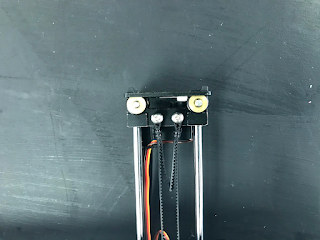
| Then we screwed in the screws connected to the wires. |
 |
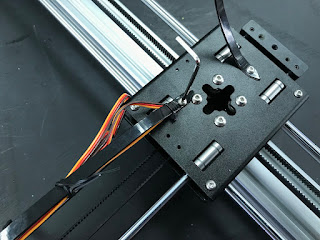
| We connected the transparent plate to the plotter using plastic screws and golden connectors. |
 |
| Then we added the microchip on top of the transparent plate, this time using metal screws connected to the plastic ones. |
 |
| We plugged in the cables in the appropriate slots. We plugged the bottom left plug incorrectly, and that resulted in the plotter not being able to go up and down while drawing, but once we realized, we fixed it quickly by turning the plug around, and the plotter worked perfectly after that. |
 |
| We then paste the four transparent protection stickers on the four corners below the plotter. Then we were done! |
Our Opinion
After we finished assembling it, we had to connect it to a program called “Inkscape”. None of us had experience with Inkscape or any of these kinds of software, so it wasn’t easy. For those who are familiar with Inkscape, it will be a piece of cake.
After we figured out how to program it, we wanted to see it draw. So we started off with making simple shapes, and then made the plotter write words, and the plotter worked perfectly! We had to adjust the home position of the plotter every now and then, but besides that, it was fun to watch it draw.
We recommend this product to schools and teachers, and those who want to learn more about plotters like this one. Unfortunately you are only able to control it from a computer. So for kids who don’t own one, they wouldn’t be able to control the plotter. We think that it would be better to design it so you can control it from an iPad too.
We figured out later that it’s best to tape down the paper before the plotter draws on it, since the paper will keep sliding around, the plotter won't be able to draw properly and you will end up with a weird drawing than what you initially wanted.
In conclusion, building the plotter was easier than we thought it would be, but it would be best if it came with an instruction manual. We were able to build this because we found the instructions on the company's website. We had a lot of fun building it and our only suggestions are to design the plotter so you can control it with an iPad, since not everyone, especially kids, own a computer, and please have an instruction manual next time that goes with the plotter. Overall it was a fun experience building and making this iDraw plotter draw, and we kept wondering how it draws so perfectly.