Thursday 19 May 2016

Ice Cream Tricycle Trailer


I got the idea to make this while working on a unit with our Junior Kindergarten kids about things that move. I brought my own kids to school on a weekend and we mucked about in the Makerspace and managed to put something together in an afternoon.

I pulled the tires off of a bicycle that I had found in the trash and cut a couple of circles on the router table out of some MDF. They are attached to the spokes of the wheels with zip ties. I drilled holes for some dowels and made a little hinged door. 


I built the frame from some pieces of recycled 1x4 from some old shipping crates and a 2x2 that I cut from a pallet. 


I drilled a hole in the end and drove a carriage bolt through it to make a hook to attach to the bike.


We filled a 64oz. protein powder container with ice and salt in alternating layers.


Then inserted a water bottle filled with cream, sugar and at the kids' request, some Milo.


Then we put it in the bike trailer and used a little duct tape to hold it in.


We hooked it onto the back of a tricycle on the playground and the kids took turns riding around churning the ice cream.


After 20 minutes, there was a thick layer of frost on the outside of the container.


It came out a little grainy, but frozen well-enough to call it ice cream.


It was pretty tasty and the kids enjoyed it.  The trailer was a bit rickety afterwards and a couple of the dowels came off while I was carrying it back to my room. 

.

For the next version, I will have to use thicker pieces of wood in place of those dowels. I'm also thinking to use a container for the ice cream mixture that isn't perfectly round so that it sloshes around a bit more as the drum rotates. This might make for slightly less grainy ice cream,

It was a fun project and if you give something like this a try, I would love to hear about it.

C:


Wednesday 18 May 2016

Decoupage Cajon


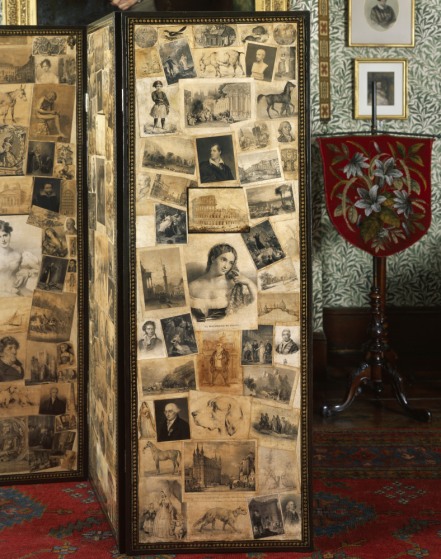
I picked up a bunch of old comic books for my kids at an outdoor market last year and when I found them a few months later with covers torn off and pages falling out, I thought they might make cool wallpaper or maybe covering some furniture. A little research uncovered the tradition of decoupage--decorating walls and furniture with coloured paper--that dates back hundreds of years. Some artists will create a collage of images, while others will create a single picture or design. On furniture, the paper is usually covered with a number of coats of varnish. There are fine examples in museums all over the world. This decoupage screen can be found at the Victoria & Albert Museum in London. 

While I was making cajon drums with grade 3 and 4 students (more on that in an upcoming post), we got an idea to try some decoupage on one of them see how it went. We found a recipe online that suggested mixing white PVA glue 1:1 with water, but this ended up soaking up the papers and causing it to buckle as it dried. We bought a few containers of Mod Podge and that worked better. 


One of our craftier teachers here suggested that I try using a spray adhesive first, to get the pages to stick, then use the Mod Podge overtop and that worked the best. Since the Mod Podge runs about 8 dollars for a single container, this also helped it go a bit further. I've worked with a few brands of spray adhesive this year and really like the 3M stuff. The other ones I used get gummy around the nozzle, but this one works great every time.


So here's how it came out:


I'm very happy with how they look and they have been able to handle kids sitting on them and beating on them without peeling. 

When our librarian saw them, she asked for us to do a couple of tables that she had in the library. The EdTech coach at our school runs a book club for boys, Books for Blokes, and they were keen to take up the challenge. We were thrilled to find a new way to help some reluctant readers develop a deeper connection with the library.


The Mod Podge provides a pretty thin protective layer that isn't really enough for heavy use, but it will protect the paper well enough that you can put a proper varnish overtop without discolouring or damaging the paper underneath.

This was a great project that the kids really enjoyed. And as far as educational outcomes go, the Marvel vs. DC arguments certainly justified the time that went into it.


Sunday 8 May 2016

Light Painting with PreK


We have been having fun with light painting for a unit our PreK students (3 years old) have been doing about light and shadow.  First, we took some corrugated cardboard and covered the windows of the multi-purpose room to black it out. (White velcro tabs in the corners worked fine and you can barely see them when you take the cardboard down.)


I had some kids from our Makers Club help me set up a DSLR (Nikon D3200) on a tripod and do some experimenting with the settings. We settled on 3-second exposures with the aperture set to F8.


I found these great little LED lights that fit on the ends of your fingers and for the first session with the little ones, we just messed around to see how it worked.


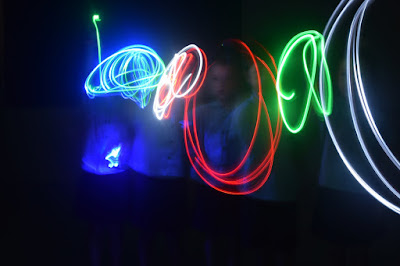
I was actually planning to move on to some new learning engagements with this class but this went so well that we decided to keep going and dig a little deeper. In class, the teachers had the students practice drawing shapes and numbers in the air with their fingers so that when they came back to me they were pretty good at it. Here's how some of the better ones came out (I flipped the pictures on the computer--much easier than getting the children to write backwards...) :


Having a remote control for the camera made this a lot easier. I was able to assign someone to turn the lights on and off and someone else to take the photos.

The next step is to try to calibrate my printer so I can print a few of these out really nicely...

How to cut down a tree